Sunday, June 10, 2012

Dog Portrait Begun

I'm finally getting started on the portrait quilt of my Ridgeback, Bree -- or rather re-started. I had previously selected the photograph, made the template pattern and enlarged copies. Now it was time to move on to the next step.

For Bree's face I've decided to use the technique I learned from Katie Pasquini-Masopust many moons ago. It is a turned-under machine appliqué technique. I think the last time I used it was on my "Angry Rabbit" quilt in the 1990's. It's always enlightening and revealing to break out a technique you've used in the past to see how it feels and looks this time around.

I've glued the paper template pattern on poster board and labeled the light, medium, and dark shapes.

IMG_0454.jpg


I also traced the pattern onto some stabilizer that will function as foundation for the pieces. I'm using Sulky Iron-on Tear-Away stabilizer.

Sunday, May 13, 2012

Distracted by Knitted Handbags

I haven't started any new art quilts lately, as I've been distracted by the fun of creating knitted handbags.

This is a repeat of the knitting tote bag that I made in an olive green for my sister.

IMG_9227.jpg


In this version I added some pockets to the lining - one large one for a kindle, some chocolate or whatever, and then 2 narrow pockets for knitting needles.

IMG_9229.jpg


Love making these tassels!

IMG_9230.jpg


This is the other one just finished. The purple yarn is by Crystal Place (I think) and the brown yarn is by Berroco.

IMG_9231.jpg


I used a magnet sewn into two short flaps as "lite" closure for this bag. The magnet was not as strong as I would have liked, but it still works.

IMG_9233.jpg


Today I clear away the handbag stuff and set up to do a new art quilt.

Tuesday, April 17, 2012

Doodads and Organization

Since I finished my last big project I've been side tracked making a mini messenger bag for my sister, which was such fun, that, of course, I have to make another so that I can include all the things I thought of doing better the next time.

So a little shopping for bag hardware and parts was in order. I tried the selection at my local Michael's. I was not impressed, even though I did manage to find some handles for a knitted bag I had finished and some interesting buttons and some zippers to experiment with.

IMG_0450.jpg


I'm getting to feel more and more that it is better to let my fingers do the shopping on my computer because I can locate exactly what I'm looking for in the right sizes without spending a lot of time and gas (all types of shopping is 30 to 45 minutes away from where I live) looking all over, only to not find what I'm looking for.

Maybe it would be different if I lived in a metropolitan area, but as I don't, I thank the internet and UPS!

With my collection of doodads and embellishments growing, it was finally time to do a little organization. I had purchased a wooden tower of drawers and so I started to add the drawer dividers to organize my embellishment threads.

IMG_0451.jpg


The dividers are heavy watercolor board cut to size and then taped in the drawer. Simple but effective.

It actually took me so long to start this organizing because I had it in mind to find some organizing trays to buy, but was having trouble finding some that were the right size. I'm now glad that I didn't find what I was looking for because the using the watercolor board, which I had already, was a whole lot cheaper and more flexible as to how wide a spot I make for whatever I what to put in the drawer. You probably don't need to use watercolor board. Any stiff cardboard or poster board would work.

Saturday, April 07, 2012

New Movable Design Wall

I finally put together a moveable design wall using a method that I first heard about from Pamela Allen, a fabulously imaginative artist from Canada.

The basic materials are:

  • clothing rack on wheels
  • Two 4' x 6' 1-inch thick insulation board
  • duct tape
  • a white sheet
  • pins


  • The two insulation boards are put on either side of the rack and then duct taped together. Then I pinned the twin size flat sheet on one side using regular straight pins. If I find that the pins are not holding when I start loading up the design wall with designs, I'll substitute the straight pins with upholstery pins (pins with a curly-cue at the end).

    IMG_8967.jpg


    Nothing fancy, but it does the job and now I can easily move it to get at the contents of the shelving unit that is behind it.

    This is the back/other side that I haven't covered yet. I'm going to cover it with black fabric. This way I'll have either a white background or a black background upon which to photograph finished art quilts.

    IMG_8968.jpg


    The one thing I may change later is to use a heavier white fabric, maybe flannel, because the sheet is a little thin and you can see the shadow of the duct tape behind it.

Thursday, March 29, 2012

iPad Messenger Bag - Quilted

My sister, who is having knee issues, asked me if I could make something that would make it easier for her to carry the essentials - iPad, iPhone, money for cappuccinos - while she was required to be on crutches. I've always want to give making a woman's accessory (I've already made plenty of neckties) a try using my own brand of embellishment and styling, so I said I'd get started on it right away.

First thing to do -- get the dimensions of a iPad. She wanted a messenger-type bag, but only as big as necessary to hold her iPad. The only other requirement was that it have pockets for iPhone and wallet, and that it have a method of securing it closed.

Next, Googled messenger bag tutorials. There were lots of them. I read through several and put together a set of specifications that would create the size bag I was looking for.

I planned to piece and quilt all exterior parts of the bag, so the next stage was piecing fabric that I'd use to cut out the pieces. I used wool suit swatches that I got from a friend that use to work for Neiman Marcus in Palo Alto, CA.

Once the parts were cut out, I layered the exterior fabric with a woven interfacing, and a muslin backing to quilt the pieces. I played with various types and weights of thread to see what worked best, and even though they were all different colors, I figured it would work with the patchwork look of the bag.

I really liked the look of the Aurifil 12wt variegated thread, unfortunately my supply was limited and I didn't quite have the colors that I wanted. (Obviously I need to increase my thread supply!) So only the sides of the bag use the Aurifil.

I also tried some Valdani 40wt and Superior's 50wt. All nice, too.

The quilting took the most time. The assembly of the lining with pockets and the bag, was fairly straight forward and not as difficult as I had feared.

For the closure, I had wanted to use some sort of toggle closure, but not having one on hand and probably not able to find one any time soon, I opted for a single large button.

This is what the finished bag looks like:

IMG_8854.jpg


IMG_8855.jpg


IMG_8856.jpg


IMG_8859.jpg


Tomorrow I'll mail it off to my sister for some real life testing to see how it stands up to use!

Saturday, March 10, 2012

Rabbit Squared

Ah, the joy of creating art! Now that I finally finished my latest traditional quilt it is time to get back to the art I love. Not that I don't really enjoy making traditional quilts, but it is just not the same thing.

First on my long list of art projects was creating a piece for the annual Studio Art Quilt Associates auction. I'm a professional artist member of SAQA and every year I like to show my support by donating an art quilt for this auction. The auction proceeds are used fund exhibits and programs throughout the year. All pieces in the auction are 12" x 12"

This year the auction will begin on Monday, September 10th at 2:00pm EST and conclude on Sunday, September 30th at 2:00pm EST. The auction pieces are usually up on the SAQA website by July.

This year I decided to use my favorite rabbit design in this small format (12" x 12").

IMG_0445.jpg


Here I have the rabbit design traced on freezer paper, a muslin foundation ready for the fused pieces and my stash of fabrics lined up and ready to use. (The TV remote is being used to hold down the freezer paper that wants to roll up.)

Lately I've been collecting brown and red/brown fabrics in anticipation of working on a large quilt of my Ridgeback, Bree (she is a red-wheaten). I was very glad to have a good range of colors and patterns to choose from. It really makes a difference on being able to get the effect that I want to have.

Here it is finished!

IMG_8796.jpg


I'm calling it "Rabbit Squared #1" (#1 because I really like how it turned out, so will have to make more. You know how rabbits can multiple!)

The fused rabbit was quilted directly onto the background. The background is pieced from leftovers from the traditional quilt I just finished. Serendipitous availability of just the right leftovers is always fun.

The rabbit is free-hand zig-zag stitched around each piece of fabric using a variety of threads: Mettler poly, Sulky poly, and Madeira metallic. The background was pieced with Aurifil 50 wt and quilted with Mettler poly. All of the quilting threads were variegated.

IMG_8799.jpg

Sunday, March 04, 2012

Blueberry Peel Top is Done!

Finally, I have finished work on the Blueberry Peel quilt top.

IMG_8786.jpg


The top is for a Queen size bed - 96" x 108". The paper-pieced block pattern is from Karen Stone's Indian Orange Peel pattern that I purchased way back in 1993 when I took a class from Karen. (Marvelous class, marvelous teacher!)

9418DD63-CAEA-4931-9E9B-6E1D1DF56815.jpg


This is an illustration of how much fun it is to play with colors! You can take a pattern like Karen's and create something that looks so different just by changing colors and layout.

Every once in a while I keep track of the time it takes to make a particular project and I did it with this quilt top.

This is how long it took to finish the various parts:


  • Cut out the paper templates for 296 arcs = 4.35 hours

  • Paper-piece the races = 51.8 hours

  • Trim the edges of the arcs = 3.5 hours

  • Remove paper from the arcs = 9.87 hours

  • Remaining cutting and assembly = 20.18 hours


For a total of 89.7 hours! Multiply that by your basic minimum wage and you'll begin to understand why a hand made quilt should never be sold for anything under $1000. This total doesn't even include material costs, quilting services, or binding. I also wasn't absolutely meticulous in starting my timer the minute I started work.

Granted a less complicated quilt top would probably be completed faster or one that didn't use so many different fabrics. I'll have to time the next quilt I made, just for comparison. (I've got an app for this on my iPhone, so it is more fun than watching a clock!)

For a number of the border layers I used the leftover trimmings from the arc backgrounds. This "scrap" was large enough to cut pieces that were around 1.5" x 2", which I sewed into mini 4-patches or into strips.

It is always fun, and sometimes quite a surprise, to see what my finished quilt looks like when I finally spread out the finished quilt top to take a picture because while I'm working and designing in my tiny studio, my quilt project is generally in a big lumping fabric bunch. The borders and such are designed roughly on paper because my design "wall" is only 4' x 6'.

Next on my project agenda is a 12" x 12" art quilt to donate to the Studio Art Quilt Associates auction that is held every year, usually in the Fall, but I don't have the exact dates yet. I just know the deadline for submission is this month!

Monday, February 27, 2012

Waiting for Organization

My studio was getting over run with stuff again, so I decided that I needed more storage for all the bits, pieces, and miscellaneous stuff that I seem to accumulate at an astonishing rate.

I found this 14 drawer tower at Home Decorators and even better - it was on sale!

IMG_0409.jpg


The drawers, sides, top and bottom of the tower are of a nice solid construction. The only negative is that the back panel is flimsy stuff and I had read this in the reviews, so I was prepared for it. However, since that part was going to be facing the wall, it was something I could live with.

I also got some metal drawer label holders - the kind that you can slip a piece of paper in and readily change whenever you need to.

I got this a couple of weeks ago, but haven't yet found the time to start filling it. I'm still in the middle of a project (which is why the stacks of fabric are all over the place) and until that is done, I can't really get into the reorg feeling.

Sunday, February 05, 2012

More Blueberry Peel Pieces

I'm still working on the Blueberry Peel quilt. The main portion of the top is finished.

This is a shot of a portion of it.

IMG_0399.jpg


I'm now piecing some more peels for a border treatment. The peels are in white and pale blue patterns and the background will be the darker blues and gray/black.

IMG_0400.jpg


Finished another knitting project - a bulky yarn shrug. Perfect for keeping warm at the sewing machine when you want your wrists and arms free but still have your shoulders and back warm.

IMG_0404.jpg

Tuesday, January 10, 2012

Studio Update - Jan. 10

Obviously all my creativity has been soaked up in my studio and I have none left for creative blog titles.

I'm still working on the paper-piece Indian Orange Peel. I've made it to the stage of piecing and preparing the centers for the blocks.

I'm using a tone-on-tone white fabric paired with a light blue. The four-patch is first pieced in 5" strips and then cut into 5" sections, that are then pieced to create the final 4-patch.

Next the freezer paper templates for the centers are ironed on the four-patch and excess trimmed away. I'm saving the trimmings for potential use in the borders.

IMG_0396.jpg


This is a example of what the finished block will look like, although these are not yet sewn together.

IMG_0393.jpg


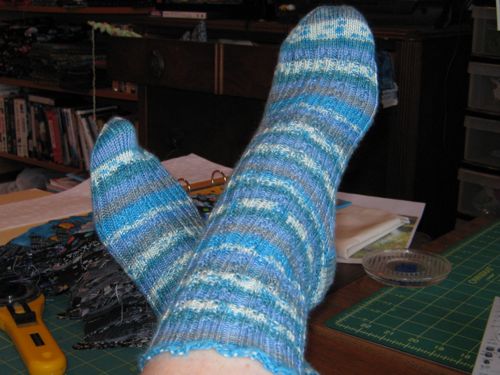
On the knitting front, the sock block has been broken! All of last year I had this particular yarn on my needles that I just did not like. But the practical side of me just would not let me pitch it out, even though I had no motivation to work on the blinkin' socks. So that one pair of socks took me about a year to complete! Now that they are done, I'm a happy sock knitting fiend once again.

These are the latest off the needles and I already have another patterned pair almost finished.

IMG_0391.jpg


So let this tale be a lesson to you - sometimes you should just pitch the uninspiring project/materials!

Wednesday, January 04, 2012

Happy 2012

January and February are always two of favorite months because that is when I have the most time to spend in my studio.

I also use the time to do a bit of reorganizing, as usual. Things seem to pile up in the studio through the year and there comes a time when you just have "clear the decks" to be ready to tackle the projects for the new year. To this end, I ordered a 14-drawer tower that I plan to use for embellishment supplies - beads, ribbons, fancy fibers. I'm waiting for it to arrive.

In the meantime, I'm still working on the paper-pieced quilt. I finished piecing all of the arcs and the next step is the center portion, around which the arcs are attached.

IMG_0389.jpg


This is the mountain of scraps (at least 12" in height!) produced by this process that I'll be mailing off to a quilter who does scrap pictures. She said the color combination sounded perfect for night skies.

IMG_0388.jpg

Friday, December 02, 2011

Scrap Storm

I'm currently working on a paper-pieced bed quilt using Karen Stone's pattern Indian Orange Peel. I started this in a class sometime in the early 1990's and am finally getting around to doing something towards finishing it!

Nothing orange about it though - I'm doing it in blues, grays, and blacks (Blueberry Peel??)

IMG_0383.jpg


As I'm getting into it I'm reminded of the incredible fabric scrap storm created with this method!

IMG_0384.jpg


I actually love the look of this pile of scraps (which is why I let it pile up in the first place). There is an even bigger pile on the other side of my chair! It has always seem like such a waste to throw it away. So this time I've teamed up with another fiber artist who works with tiny scraps and I'm going to package them all up and send them to her.

I'm also keeping track of the time it takes to do each part of the process, which is fun to do now and then. This is not for the faint of heart or those thinking of going into business selling quilts like this. For example, I've already timed how long it takes to piece 4 of the arcs, which is what each block takes - about 40 minutes - and I'm going to need about 196 just for the main part of the design! I'll post the complete breakdown when I'm done.


Wednesday, October 26, 2011

Pressing Matters

Just last week I received the Elna OpalPress that I won in the International Professional Quilter Association membership drive. It was perfect timing because I was already planning to wash and iron my accumulated new fabrics in preparation for my winter studio time.

IMG_8253.jpg


It was very easy to set up once I cleared off some space on my cutting table.

IMG_0378.jpg


Here is the mass of fabric waiting to be smoothed.

IMG_0379.jpg


Once the press reached the proper temp, ironing the yardage was a breeze. Just lay out the fabric . . .

IMG_0380.jpg


Close the press for a few seconds and it was done! Marvelous!

IMG_0381.jpg


While it took less attention to do this pressing (so I could pay attention to the movie I was watching), you do want to be very careful when positioning the fabric on the board so that you don't touch the pressing panel. That pressing panel on the top is HOT! I brushed it briefly once with my knuckle -- ouch!

A finished stack of fabrics.

IMG_0382.jpg


Overall the Elna OpalPress is wonderful and it is going to make pressing fabric yardage fun. I just wish I had the space in my studio to leave it set up all the time, but it is great that it stores and sets up very easily.

My very first sewing machine was an Elna AirSU, so I was already expecting that I was going to have a quality product from Elna! I bought it when I was 16 and it is still around - although at my daughter's house.

I'm still debating whether to share it with our inn (the Greenville Arms 1889 Inn) housekeepers! I'm sure it would make ironing sheets, pillowcases, and table linens much easier, but I'm loath to give it up myself! May have get another one just for them. I'll have to try it out in the laundry myself this winter, when I do most of the housekeeping myself.

My husband says now I can iron his shirts. I told him I would leave the instruction manual out for him! ;-)

Monday, October 10, 2011

Squirrel-ish Dilemma

I want to be happy with this, and I am with most of it, but still it is not quite right.

The dilemma is that to fix what I think needs fixing could require removing most of what I've already done. Gads! Suggestions are welcome.

IMG_0362.jpg


My next moment in the studio is not until next Saturday, so I'll be mulling this over all week.

Sunday, October 02, 2011

Hear the Music

I finally decided what to do with the rabbit figure I created last December. The rabbit has been on my design wall all year just waiting for inspiration to strike.

I was cleaning up my studio and came upon stack of leftover cut-outs from making guitar ties. I spread them out on my cutting table trying to decide if there was some way to reassemble them into a "fabric" sheet that I could use again, when out of the corner of my eye the rabbit beckoned. I lay the rabbit on top of the scraps and noticed that the colors were very complementary for the rabbit and when reassembled in a random fashion were scrambled enough to become an almost neutral background.

Well, that was that. I call this piece "Hear the Music."

HearMusic.jpg


I'm currently working on squirrel piece. The squirrel and tree were created by the same technique as the rabbit.

IMG_0356.jpg


Right now I'm working on what other elements I'll add, such as the grass. Nothing is stitched to the background yet, so this is very much a work in progress.

IMG_0357.jpg


I'm also playing with the idea of adding some sort of flowering tree/shrub blossom in the upper left corner, just to contain the eye within the composition.

IMG_0358.jpg

Sunday, August 21, 2011

Knitted Knitting Bag

I've been trying to finish up all the unfinished projects laying around my studio, preparing for winter when I can work on some new larger scale projects. As I work during the year, some projects general a lot of "stuff" that get stacked all over the studio, so that by now I and barely see my cutting surface (the floor with a large cutting mat).

Then there are the projects that sit around waiting for some missing part or motivation to finish them.

One of these is this knitted tote bag that I must have started several years ago. It had been waiting for the bamboo handles, but I got those over a year ago. It was the motivation that was lacking! I think I was intimidated by the process of attaching the handles. So silly, since it turned out to be quite easy.

IMG_0344.jpg


The tassels were fun, too! I lined it with a light weight denim fabric.

Wednesday, July 06, 2011

What a Crazy Pear

I've been having lots of fun creating small fabric mosaics with the subject of pears. I choose pears for their interesting shape and interesting blend of colors.

After doing the first with a rather neutral light brown background, I thought I punch it up a little with BLUE! After all, according to Charles Gruppe (an oil painter), blue sells! LOL! It's also one of my favorite colors.

IMG_7463.jpg


After completing the one above I was debating whether I should do another, because I do have other half finished projects on my design wall staring me in the face and demanding to be finished, but it's like pistachios - you can't stop at one!

But then the whimsey took hold of my brain and I sent my Pear Out to Sea.

IMG_7469.jpg


That was it. I put away my tiny squares of fabric tiles before I started on Pear on the Moon, or Pear at Times Square. I'll have to let these ideas percolate while finishing the squirrel and rabbit pieces that I started last winter.

Tuesday, June 21, 2011

Studio Art Quilt Association Auction Piece

I actually managed to finish a piece for the SAQA reverse auction this year. I started it last week thinking to myself "I'm really getting it done early this year so that I don't miss out" because I remembered the auction being in the Fall. Then I looked at the deadline on the SAQA site - July 1st! Gads, right around the corner.

I love mosaics and have been making several fabric mosaics to fit in a bunch of frames that I had purchased during my street art fair days. So I thought I'd do a 12" x 12" version for the auction (not framed).

IMG_7370.jpg


The reverse auction takes place in September. You can find out more about it and also preview other pieces on the SAQA website.

Monday, June 06, 2011

A Light in the Forest - SOLD!

One of my favorite color impression quilts just sold!

light_forest_f.jpg


It had been hanging in one of guest rooms at the Greenville Arms 1889 Inn but now it has gone to a new home.

Saturday, June 04, 2011

Material Collection

A couple of weeks ago there was a fabric shop hop in our area, and while I knew I wouldn't be able to make it to all the shops (eleven), I hopped where I could.

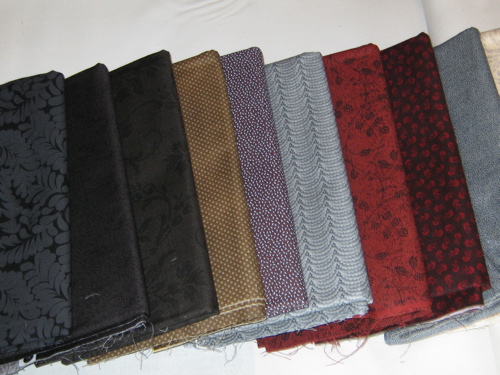
My current fabric collection themes are grays and reddish browns. I have a couple of large scale pieces in mind that will need this palette of colors, so I'm stocking up.

The first shop I went to (which wasn't actually in the hop) was The Patchwork Co. located in Windham, NY. This is a relatively new shop. Because they are located Windham, they specialize in fabrics by Windham Fabrics.

thepatchworkco_aboutus.jpg


They have a lot of Civil War repro fabrics, which have some very nice grayish hues.

IMG_0338.jpg


The next shop I visited was The Joyful Quilter in Glenville, NY. This shop had recently relocated to a much larger shop and I was anxious to see the new place. I was not disappointed! It is a wonderful spacious and bright shop with a fabulous selection of fabric.

JQ_logo_2011.png


I came away with the 5 yards pictured at the top of the photo below. The shop is known for its collection of bright modern fabrics. I had a hard time resisting them, but I stuck to my gray and red/brown theme.

IMG_0336.jpg


The final shop stop was the QuiltBug in Esperance, NY. This was my first visit to the shop and I love it! I also discovered that by the back roads it is only about 30 - 40 minutes from our inn. So now I'm going to have to add this shop to my "support my local shops" rotation!

shops.jpg


They had a fun selection of color basics and fun novelties. I broke from my theme to get those yellow chicks fabric! Can't resist silly farm animals.

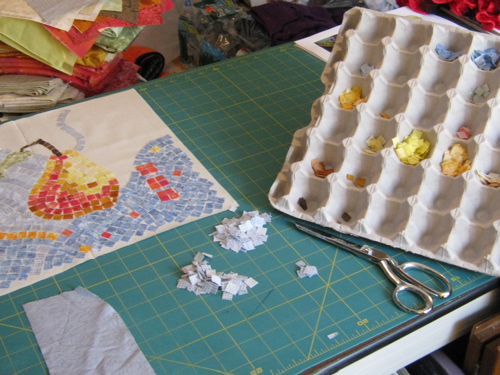
Back in the studio I've been working several mosaic pieces. The one seen here is one that I'm working on for the SAQA Auction which begins in September.

IMG_0340.jpg


I had thought that I was getting a head start with this piece, vaguely remembering that the auction was in the Fall, until I looked at the deadline as I wrote this blog! The pieces are due by July. I better hurry.