When we are deep in our workshop season at the
Hudson River Valley Art Workshop, my personal studio time becomes extremely limited. My work day begins at around 5:30am and ends at around 8:30pm. By then I'm exhausted and just want to hang out with my two pups and knit.
But as one of those pups is the inspiration for my current studio project, I do still try to escape to my studio every now and then, even if it is for just a couple of hours.
So here is an update on the bit by bit progress on the portrait of Bree, our Rhodesian Ridgeback.
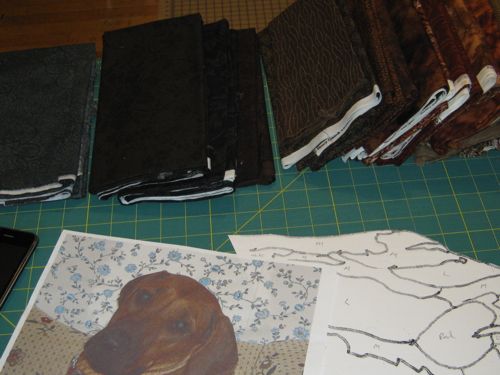
I start by pulling all potential fabrics for the project from the shelves and lining them up by value on my worktable.
I keep checking the reference photo to verify color and tone with the fabrics I've selected.
The next step is to take a deep breath and just start in on it! I trace a section of the pattern from the poster board onto freezer paper. This will be my pattern for cutting out the fabric pieces.
Then I select the fabrics I'll use for this small section. I usually then number the freezer paper pieces (before cutting them out) and arrange the fabrics on my table in order that I'll use them. This makes it easier to pick up from wherever I left off and also to remember which fabric I planned to use where when it may be a week to a month before I get a chance to work on the project again.
Now comes the cutting, edge turning, and putting the puzzle together part! The freezer paper template is ironed on the fabric and then cut out leaving a 1/8 to 1/4 inch allowance to be turned under. Then the corresponding poster board piece is cut out and used for turning under the edges.
I use
Mary Ellen's Best Press - the clear starch alternative. I love it. I use to use regular spray starch but Mary Ellen's is so much better and cleaner to use, plus you don't have to worry about attracting bugs to your quilt later on, especially if you don't plan to wash it, which I don't for my art quilts.
The pointed tool is a stiletto used to hold the edges as you iron. A very handy tool that I bought from
Katie Pasquini Masopust when I took a class from her in the 1990's and learned the basis for this construction method. I think she still sells them!
The poster board template is removed from the piece and then turned-under-edge pieces are arranged on the piece of
Sulky Tear-Away stabilizer that also has the full pattern traced on it. The pieces are held in place just with the touch of the iron at a few places, not fully ironed down. This way you still have the chance to change pieces if they are just not working out in the over all design. I'll wait to I have the full figure complete before re-evaluating the fabrics.